Making a princess cake from scratch…
This post contains the complete recipe and methods from start to finish that I used to make my daughter’s Princess Birthday cake.
It was a tough challenge to set myself for my daughter’s 5th Birthday party but it meant a lot to her, so it meant a lot to me too.
I know this is completely off topic for this website, but it may be useful/interesting even if it’s only to mock my poor cake decorating skills 😉
I hunted for a recipe or in fact recipes around the internet and they all either lead to spam sites or overly complex and just-plain-weird sites.
But I did it in the end and it was certainly extremely popular! (One mum even said to me “Ben, you’ve set the bar very high for Birthday parties among Olivia’s friends…”)
I should point out (in case it wasn’t obvious from the photo) that I’m not a professional cake maker; I’m just a regular dad who loves his daughter and loves a challenge 🙂
In case you fancied a go at making one too, I brought together several recipes for the different elements for you here on this page (original recipes referenced as well).
Main elements in the princess cake
There are several key elements to this cake and while each is easy, the combination can appear quite daunting and time consuming:
- 3 x Madeira sponge cakes ( 2 normal, 1 in a bowl – see equipment)
- 1 x Butter Cream Icing for filling.
- 1 x White Glaze “Skirts” icing.
- 1 x Pink “Dress” Icing.
Equipment
Surprisingly, there’s not actually a huge amount of equipment needed:
- 8″ cake tin (I only had 1, but you could speed things up by having 2 and cooking 2 cakes at the same time)
- Mixing bowl (oven proof – One of those Pyrex ones will do fine)
- Scales
- Wooden spoon
- Spatula
- Long sharp knife (for taking the domes off the top of the cakes
- Skewer (for checking that the cakes are cooked)
- A small (2-3″) cookie cutter (for cutting the holes)
- Cake base
- Baking parchment (grease proof paper)
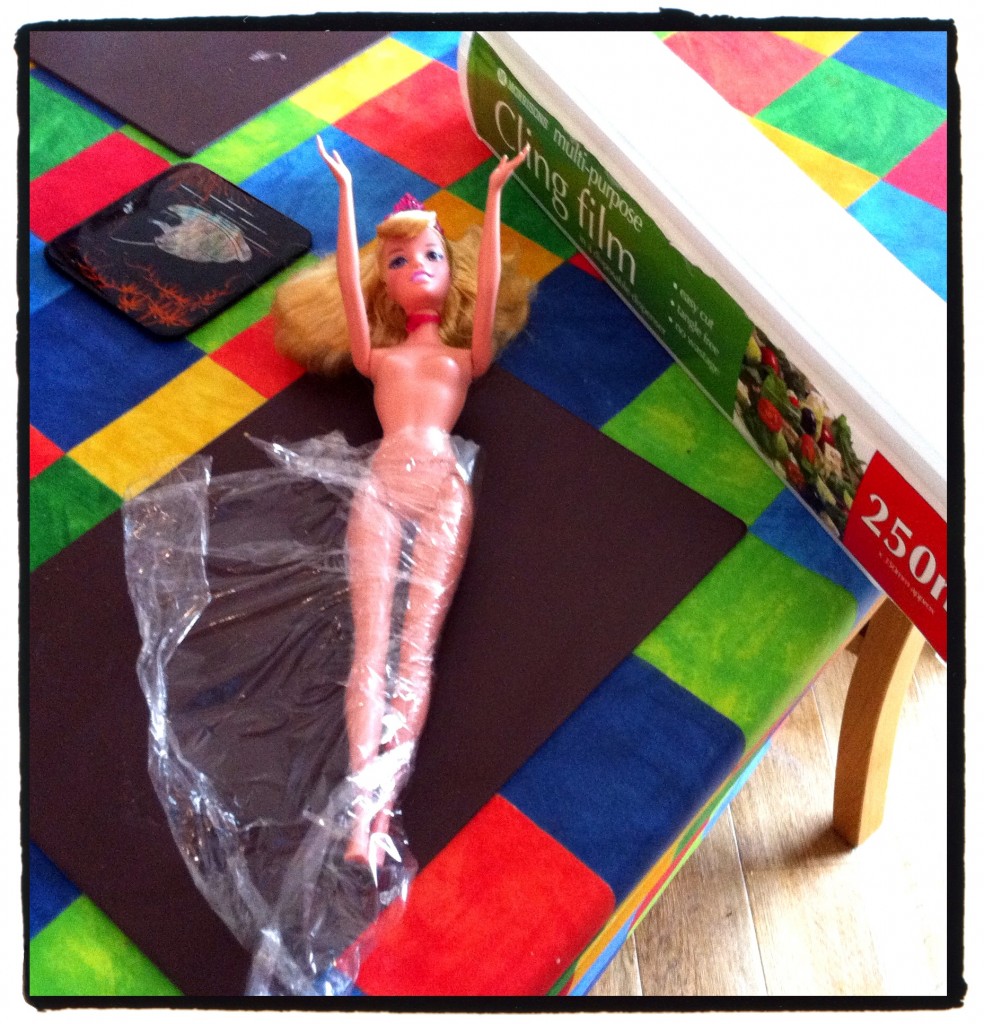
- Clingfilm (to wrap the princess. See photo further down)
Ingredients for the Princess cake
This is a large cake. You will need to buy a lot of ingredients.
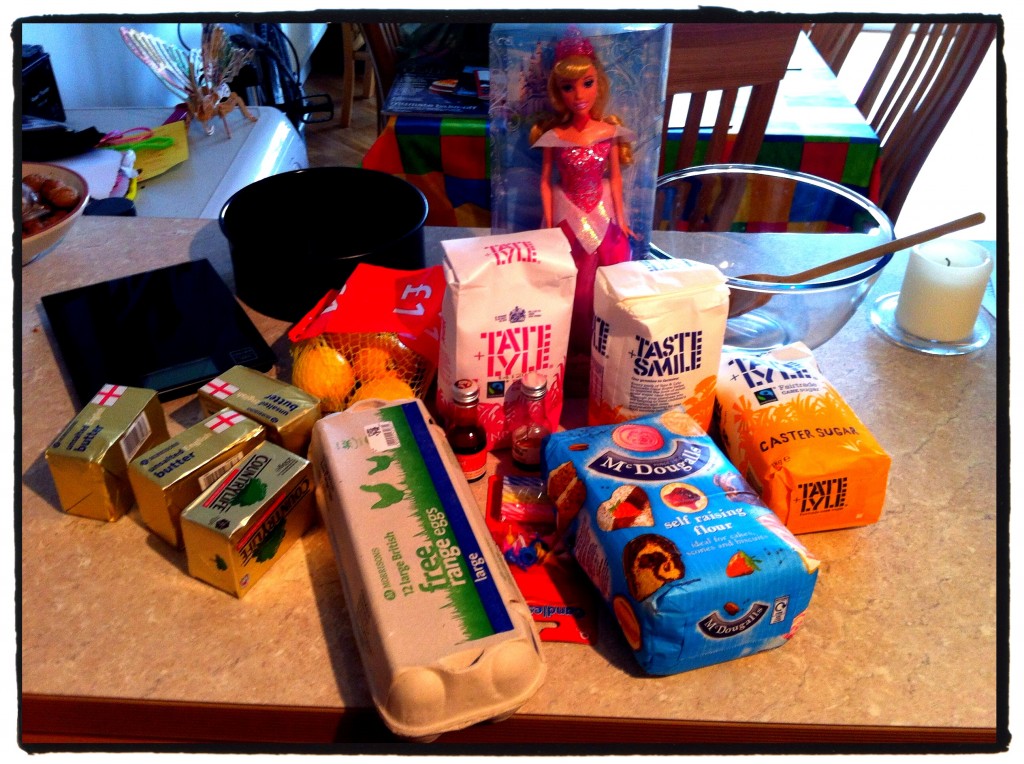
Here’s the complete list, but that only for your shopping. The amounts and ingredients are listed in the instructions for each element below.
- 1 x princess (As she’s “in” the cake, I guess that makes her an ingredient rather than equipment? Oh and make sure you can take her clothes off and remember that you cake has to be as high as her waist).
- 1077g (38oz) of unsalted butter at room temperature.
- 510g (18oz) of caster sugar (not granulated – caster has finer grains and mixes better).
- 9 x eggs
- 765g (27oz) of self-raising flour (trust me, you don’t want to be faffing with bicarb and baking powder when you’re making 3 of these bad boys).
- 6-9 tbsp milk (I used semi-skinned).
- Zest of 3 Lemons/Oranges OR 3 tsp Vanilla Essence (I made one cake of each flavour, so only 1 lemon + 1 orange + 1 tsp of Vanilla).
- 1077g (38oz) icing sugar – sieved
- 15ml water
Constructing the Princess Cake
Here is a preparation list for the overall cake. Making the individual pieces is listed below.
- Make the Madeira sponge cakes.
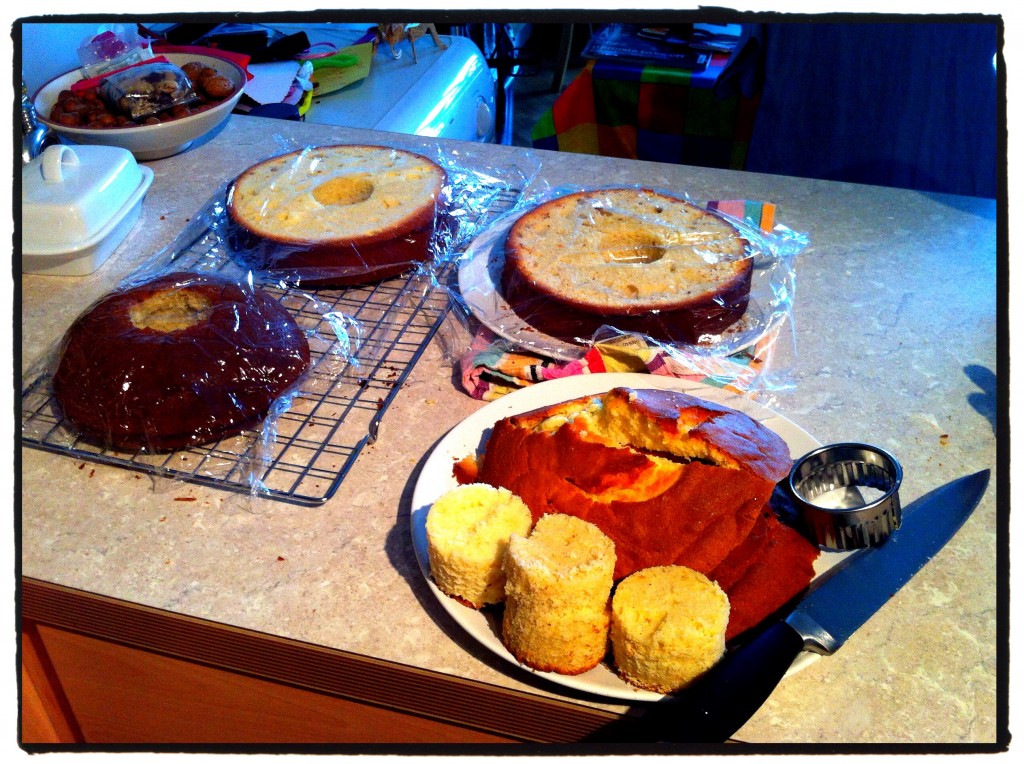
- Once cooled, use the long sharp knife to take their dome’s off so they have flat tops and bottoms (obviously only cut the top off the cake cooked in the bowl).
- Use the cookie cutter to put a hole in the middle of each cake (hold onto these cake holes as you may need them later). This is where the princess is going to stand in her dress.
- Make the butter cream filling icing.
- Stack cakes with the filling between each layer
- Place in the fridge for 45 mins to allow the icing to stiffen.
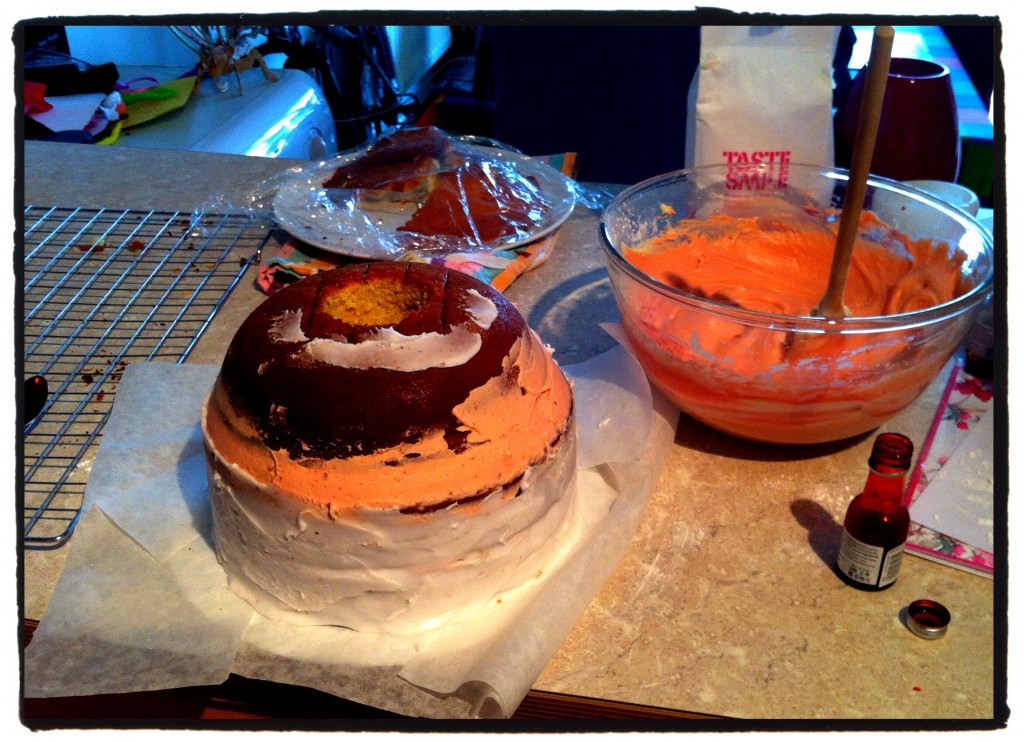
- Make the “skirts” icing from plane white glaze icing.
- Place strips of baking paper/parchment around the edge of the cake. This will keep the cake base clean (see the image with the glaze “skirts”icing).
- Ice the “skirts” onto the cake. There are two purposes to this:
- To put an under-coat of icing to seal in the crumbs and make applying the outer icing more easily
- To add a touch of class to the princess’ dress by showing a different under skirt to the main pink ball dress (see photo of finished cake)
- Stick back in the fridge for 45 mins to allow the glaze icing to stiffen.
- Make the butter cream “dress” icing.
- Give the princess doll a quick clean, dry and wrap her legs in clingfilm to minimise the amount of cleaning she’ll need later (make sure it’s tight around her waist)
- Stand the doll in the cake. Now at this point, I discovered that even though the cake was massive, the princess’ waist was still a bit taller than the top of the cake. So I used one of the cake holes and cut it to go around her and raise the top of the cake a bit. I was worried about whether it’d look like she has a big bum, but it’s actually ok!
- Spread on the pink butter cream icing in thick swirls being careful to leave the white under-skirt showing a little around the bottom. I was worried that this would be difficult, but it was actually pretty easy.
- Now make an icing piping bag from baking parchment (checkout the linked YouTube video – it’s really easy).
- Pipe on the top of the princess cake’s dress and any additional decoration you want. I added some pretty strings hanging down from the bottom of the pink dress onto the white underskirt to highlight the different layers (see the final picture)
- Decorate with additional bits at required (I used candy stars and mini edible gold stars).
- Run a knife around the very bottom of the cake to cut off any overspill of icing and pull out the strips of baking parchment
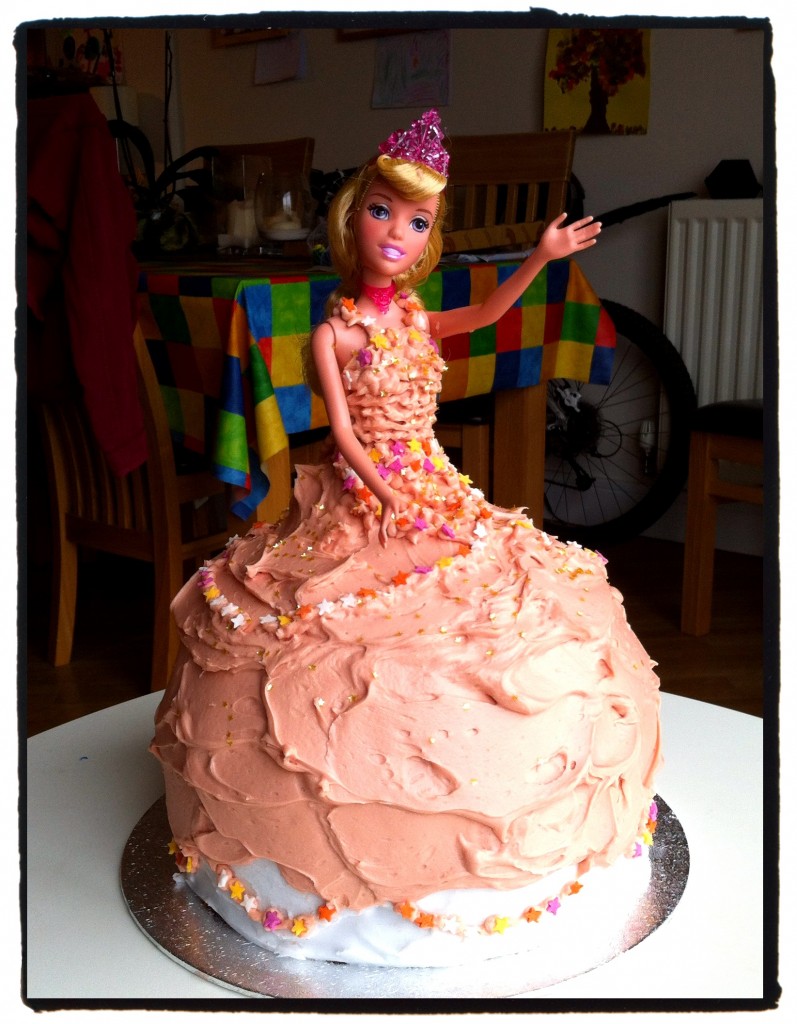
Finished Princess Birthday Cake made from scratch
Making the individual elements of a Princess Cake
So you know roughly how it all works together, but how do you make the individual bits? Read on for full recipes.
Making the Madeira cakes
I chose Madeira over plain sponge because they’re heavier and more robust and generally better for sculpting in my opinion. Of course you’re welcome to try another type of sponge recipe and please let me know how you get on!
Remember you are going to be making 3 cakes here. The first two will be normal cakes baked in the cake tin, the third will be baked in the mixing bowl (which is why it needs to be oven proof).
Ingredients (per cake)
- 175g (6oz) of unsalted butter at room temperature (from the fridge just won’t work. Give it 15 secs in a microwave).
- 175g (6oz) of caster sugar (not granulated – caster has finer grains and mixes better).
- 3 x eggs
- 250g (9oz) of self-raising flour (trust me, you don’t want to be faffing with bicarb and baking powder when you’re making 3 of these bad boys).
- 2-3 tbsp milk (I used semi-skinned).
- Zest of 1 Lemon/Orange OR 1 tsp Vanilla Essence (I made one cake of each. The lemon is the best though imo).
Preparation
- Preheat the oven to 180C/350F/Gas 4. (I have a fan oven and 180C was fine).
- Cream the butter and sugar in the mixing bowl (“cream” means light and fluffy. Be prepared to spend some time on this getting achy forearms).
- Sift in the flour and fold together with the creamed butter and sugar.
- Beat in the first 2 eggs one at a time ensuring that the mixture remains light and fluffy.
- Beat in the last egg with a tbsp of the flour to stop the mixture curdling.
- Add small amounts of milk and mix in until the mixture falls gently from the spoon.
- Fold in the Lemon/Orange or vanilla.
- Grease your cake tin.
- Dolop the mixture into the middle and gently flatten the top.
- Cook for 30-40 minutes or until a skewer inserted in the middle comes out clean.
- Let stand in the tin for 10 minutes before turning out onto a wire mesh to cool
At this point, I would like to note that in my fan oven, both normal cakes took 40 minutes but the one in the bowl took 55 because it was deeper. Greasing the bowl with butter also worked fine and the cake came out no problems!
Making the layer “filling” icing
So next up is the filling icing that is going to sit between the layers in the cake. I chose to make a standard butter cream filling.
Ingredients
- 140g (5oz) unsalted butter at room temperature.
- 280g (10oz) icing sugar
- 1-2 tbsp milk
- few drops food colouring (I used about 2 cap fulls of red to get to a pinky colour, but do it a little at a time until you get the colour you want)
Preparation
- Beat the butter in a large bowl until soft. Add half of the icing sugar and beat until smooth.
- Add the remaining icing sugar and one tablespoon of the milk and beat the mixture until creamy and smooth. Beat in the milk, if necessary, to loosen the mixture.
- Stir in the food colouring until well combined.
Making the princess cake “dress” icing
This is actually the same recipe and preparation as for the filling layer, however I doubled the quantities. I had a little left over at the end and it is on very thickly, but single quantities would be too little imo.
Making the white glaze “skirts” icing
The icing I used for the skirting is the super-simple standard glaze icing. I’m sure you could get all complicated with royal icing etc, but this is quick and easy.
Ingredients
- 200 (8oz) icing sugar – sieved
- 15ml spoon (1tbsp) water
I have used double the amounts listed in the original (see references) recipe as it’s a very big princess cake!
Preparation
- Mix sieved icing sugar with water in a bowl.
- Beat until smooth (which is easier said than done – this is strange material when mixed. It doesn’t respond to rapid movement, but is relatively fluid if treated very slowly).
- Consistency needs to be thick enough to coat the back of the spoon.
References
This princess cake recipe isn’t “my” recipe, it’s cobbled together various recipes from various places. Here are the links to those original recipes.
- Madeira cake recipe on the bbc website.
- Making Butter Cream Icing. I used the same recipe for both the filing icing and the outer “dress” icing. Obviously I also added red food dye to make it pink.
- The white glaze icing recipe.
- Making a parchment paper piping bag.
